Last updated November 18, 2026







Free written scope consultation - allowances, timeline, and change-order rules on paper before a single trade is scheduled
Bathroom Remodeling Troubleshooting: Common Problems and How to Fix Them
The most expensive bathroom remodel mistake isn’t bad tile selection. It’s a shower pan that was waterproofed to the floor but never tied into the wall substrate. That failure stays invisible for 18 months, then shows up as a soft spot behind the bench, a musty smell that won’t leave, and framing that has to be cut out and replaced. In Fort Worth, where our clay soils shift and our humidity swings hard between seasons, those hidden failures tend to surface faster than homeowners expect. This guide walks through the waterproofing failure points, drain slope specs, toilet flange and wax ring problems, valve calibration issues, and the hard water maintenance protocol that keeps a new bathroom from aging ahead of schedule. You’ll learn what to inspect before tile goes up and how to identify trouble after the fact.
Quick Answer
Most bathroom remodel problems trace back to four failure points: waterproofing that stops at the floor instead of running up the wall substrate, shower drains installed with less than the required quarter-inch-per-foot slope, wax rings that fail because the toilet flange sits below the finished floor, and valves that weren’t calibrated to Fort Worth’s water pressure. Catch these during construction and you avoid the 12-to-24-month delay before water damage becomes structural. Catch them after the fact and you’re looking at substrate rebuilds, not tile patches.
Styles & brands we work with
- Kitchen remodeling
- Bathroom remodeling
- Home additions & ADU
- Roofing
- Windows & doors
- Driveway & pavers
- Fence
Table of Contents
- The Three Waterproofing Failure Points in a Tiled Shower
- What to Inspect Before Tile Goes Up
- Drain Slope Failures: Is It a Tile Fix or a Substrate Rebuild?
- Toilet Rocking and Wax Ring Failure: Loose Bolt or Subfloor Damage?
- Pressure and Temperature Inconsistency in Shower Valves
- Fort Worth Hard Water Protocol for New Fixtures and Tile
- Grout Cracking Patterns and What They Tell You
- Ventilation and Moisture: The Slow Failure Nobody Watches
The Three Waterproofing Failure Points in a Tiled Shower
A tiled shower has three places where waterproofing fails most often, and all three share the same root cause: the membrane stops short of the wall substrate and relies on caulk or thinset to bridge the gap. Water always finds that gap. It doesn’t matter how good the tile looks on day one.
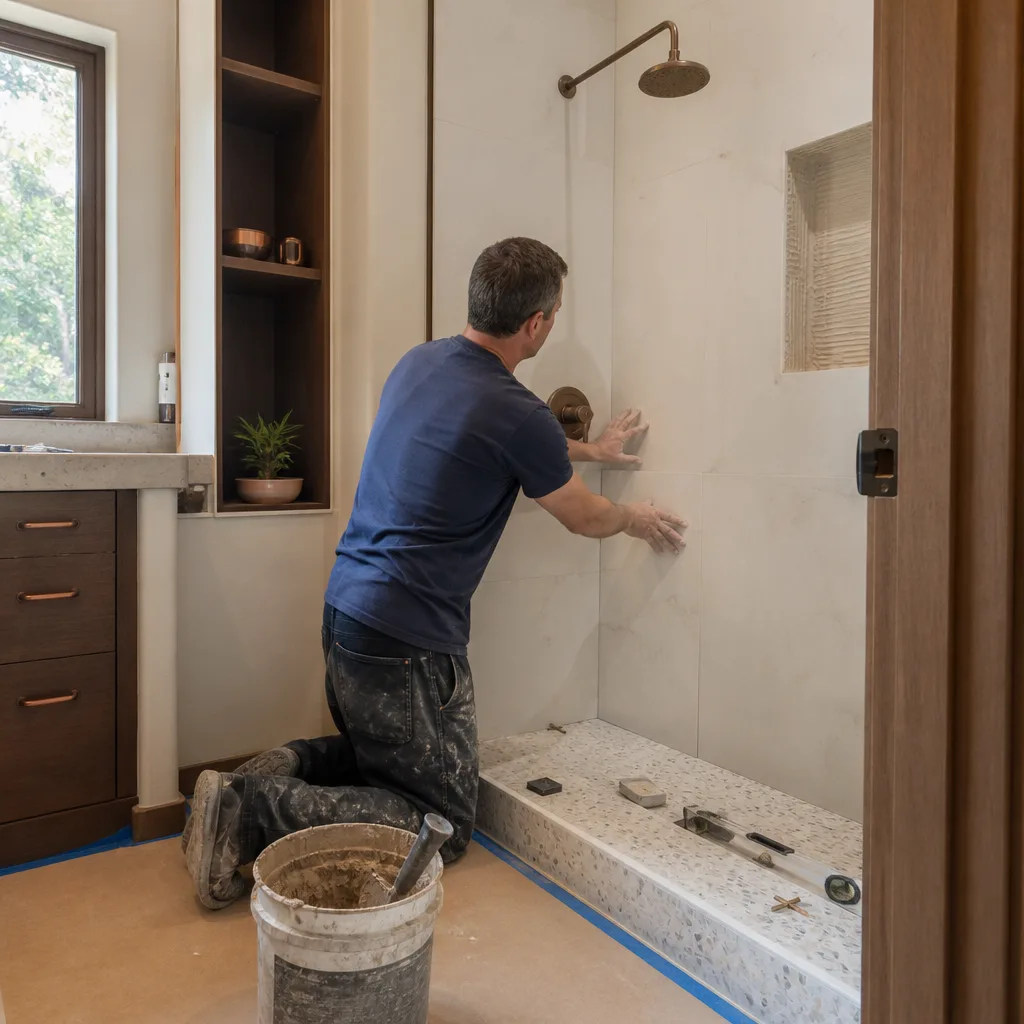
1. The pan-to-wall transition. The waterproofing membrane must run continuously from the shower floor up the wall to at least six inches above the curb, and the wall board behind it must be cement board or a bonded waterproofing board, not standard drywall. The most common shortcut is a pre-formed pan that gets set against greenboard with a bead of silicone at the seam. That seam is the failure. Water wicks behind the tile, saturates the drywall paper, and mold starts in the wall cavity within a year.
2. The niche back wall. A recessed shampoo niche is a hole cut through the waterproofing layer. If the niche box isn’t integrated with the membrane system or sealed with a compatible liquid membrane and mesh, water enters the wall cavity every single shower. We’ve opened Fort Worth showers in neighborhoods like Tanglewood and Wedgwood where the niche back wall was bare drywall behind the tile. The grout looked fine. The framing behind it was black.
3. The curb corners. Curb corners take the most water and the most movement. Pre-made corner patches must be embedded in the membrane, not just pressed on top. A curb built from stacked 2x4s wrapped in cement board without a proper membrane will pull moisture through the wood and swell. When you see tile popping off the curb face, that’s the symptom. The cause is underneath.
For a full bathroom rebuild where we’re correcting these failures, the scope usually crosses into framing and substrate work, which is why it’s worth understanding how Groundwork Construction Co. of Fort Worth home handles full-scope projects from demolition through finish.
What to Inspect Before Tile Goes Up
The window between waterproofing and tile is the only chance to catch these failures without demolition. If you’re managing a remodel or checking on a contractor’s progress, walk the shower after the membrane is installed and before the first tile is set. Here’s what to look for, in order:
- Run your hand across the pan-to-wall seam. There should be a continuous membrane, fabric mesh embedded in the corner, and no exposed cement board or drywall paper. If you can see the board edge, the seam isn’t tied in.
- Look at the niche. The niche should be a bonded waterproof box or a liquid-membrane-coated cavity with mesh in every corner. Bare board inside the niche means failure is already scheduled.
- Check the curb corners. Pre-formed corner pieces should be visible and embedded, not surface-glued. If the installer skipped corners entirely, that’s a rebuild waiting to happen.
- Confirm the drain connection. The drain flange should be clamped to the membrane with the weep holes clear and protected. Thinset packed into the weep holes is a common mistake that blocks drainage and traps water in the mortar bed.
- Ask for the flood test. A proper shower pan gets filled with water and left for 24 hours before tile. If your installer doesn’t flood test, that’s a signal about the rest of the work.
If you’re not comfortable making that call, an independent inspection before tile is cheap insurance. Once tile is up, every one of these checks becomes a demolition job.
Drain Slope Failures: Is It a Tile Fix or a Substrate Rebuild?
A shower floor should slope a minimum of one-quarter inch per linear foot toward the drain. That’s the code standard and the practical minimum for water to move without pooling. A four-foot shower floor needs a full inch of fall from the far corner to the drain. When that slope is off, water sits in the low spot, the grout stays wet, and the pan never dries out between showers.
Here’s how to test your shower after a Fort Worth remodel. Run the shower for two minutes, then turn it off and watch. Water should be gone within 15 to 30 seconds. If a puddle the size of your hand remains after five minutes, the slope is wrong. If a puddle remains after an hour, it’s a serious failure.
Whether it’s a tile fix or a substrate rebuild depends on where the error happened:
- Tile-only correction is possible when the preslope under the mortar bed is correct but the tile was set unevenly or the drain was installed slightly high. This is rare. Most slope failures live in the substrate.
- Substrate rebuild is required when the preslope was skipped, when the mortar bed was laid flat and the tile-level slope was faked with thinset, or when the drain wasn’t set at the correct height. In those cases the entire pan assembly comes out, including the membrane, and gets rebuilt.
One thing we check on every Fort Worth pan we open: the weep holes at the drain. Our clay-heavy soil doesn’t affect the shower itself, but the humidity does. A pan that can’t weep dries from the top down only, and that’s a slow rot. If the pan needs to be rebuilt, that’s typically a one-to-two-week job, not a single visit, and it belongs with a contractor who can carry the work through tile, waterproofing, and finish under one written scope. That’s the same full-scope approach we take on Home Additions & ADU in Fort Worth, where bath and wet-area work is part of a larger build.
Toilet Rocking and Wax Ring Failure: Loose Bolt or Subfloor Damage?
A rocking toilet is often a 20-minute fix, but the same symptom can be the first sign of rotted subfloor. The difference is worth knowing before you tighten anything.
Every toilet sits on a flange, which is bolted to the floor and sealed to the drain pipe. The toilet bowl is held down by two closet bolts that pass through the flange. A wax ring sits between the bowl horn and the flange to seal the connection. Failures happen in one of two ways:
- Loose flange bolt. The toilet rocks because one bolt has backed off or the flange slot has wallowed out. You can rock the bowl by hand, but there’s no water on the floor. Tightening the bolt or replacing it with a repair kit takes minutes.
- Failed wax ring. The wax ring has compressed, dried out, or shifted, and water escapes under the toilet with every flush. You’ll see water at the base, a musty smell in the bathroom, or staining on the ceiling below if the toilet sits over a lower floor. This one requires pulling the toilet and replacing the ring.
The test: wrap a piece of toilet paper around the base of the toilet at the floor line and flush several times. If the paper comes back damp, the wax ring is compromised. If the paper is dry but the toilet rocks, it’s a bolt or flange issue.
When it becomes a subfloor problem: if the flange sits below the finished floor level (common in remodels where the floor was built up with tile over the original vinyl), the wax ring can’t reach the bowl horn. Water escapes. Over time the subfloor around the flange loses its integrity, and the toilet bolts have nothing solid to grip. That’s when a rocking toilet becomes a repair that involves cutting out and replacing the subfloor around the drain, and it explains a lot of the calls we get in Fort Worth homes from the 1950s through the 1980s, where tile was added on top of existing flooring without adjusting the flange.
Pressure and Temperature Inconsistency in Shower Valves
If your shower goes scalding when someone flushes a toilet or runs the kitchen sink, the valve isn’t doing its job. In most cases this is a calibration issue in the pressure-balancing valve, not a plumbing defect from the remodel. But it can also be a supply line sizing problem, and the distinction matters for what gets fixed.
Pressure-balancing valve calibration. A pressure-balancing valve has a spool inside that shifts when hot or cold pressure drops, adjusting flow to keep temperature steady. If the spool is stuck, dirty, or was misadjusted during install, the valve can’t compensate. The symptom is temperature swings that follow other fixture use, plus a shower that runs hot or cold at a given handle position. The fix is usually to pull the cartridge, clean or replace it, and recalibrate. That’s a service call, not a remodel.
Supply line sizing. If the shower was relocated in the remodel or new fixtures were added on undersized supply lines, the pressure can’t hold steady. A shower valve needs proper flow to balance correctly. When a Fort Worth remodel converts a tub-and-shower to a walk-in or adds a body spray system that the original half-inch supply lines weren’t sized for, the valve can’t maintain temperature no matter how well it’s calibrated. The symptom is more consistent: low pressure at the shower head all the time, not just during other fixture use.
Two ways to tell them apart:
- Run the shower alone. If pressure and temperature are steady with no other fixtures running, the valve is calibrated but the supply is marginal. If you flip the kitchen sink on and the shower temperature shifts, the valve needs calibration or replacement.
- Check the shower head flow rate. A 2.5 GPM head on a half-inch supply line is normal. A head rated 2.5 GPM or higher with body sprays on the same line means the system is starved, and no valve adjustment fixes that.
When we take on a Fort Worth bath remodel that changes the fixture layout, we check supply sizing during the design phase, not after. Upfront pricing and a written scope mean you know whether the valve and supply are being upgraded before the walls go back up.
Fort Worth Hard Water Protocol for New Fixtures and Tile
Fort Worth water runs hard, and it will etch new fixtures and stain new grout faster than most homeowners expect. The protocol that keeps a remodeled bathroom looking new is simple but requires consistency: descale fixtures every week or two, seal grout on a schedule, and catch mineral buildup before it becomes permanent.
Descaling. Faucets, shower heads, and glass get a mineral film from calcium carbonate in the water. Wipe them down after each use with a squeegee or microfiber cloth, and descale weekly with a mild vinegar solution or a dedicated descaler. Don’t let it go more than two weeks. Once the mineral film hardens onto chrome or brushed nickel, it bonds to the finish and requires abrasives that scratch. We’ve seen Fort Worth fixtures fail cosmetically within 18 months when descaling was skipped.
Grout sealing. Sealed grout resists water and stains. On a new shower, seal the grout 72 hours after installation, then reseal every 12 months in a shower and every 18 to 24 months on bathroom floors. Fort Worth’s water accelerates the breakdown of sealer, so a one-year schedule is the honest minimum for a shower. If water beads on the grout, it’s still sealed. If it darkens and absorbs, it’s due.
Early mineral buildup signs. Watch for white chalky rings at the base of the faucet, a dull haze on glass that doesn’t wipe off, cloudiness on the shower head, and white spotting on dark tile. Those are the early warnings. Once scale hardens, it needs a professional descale or, in bad cases, fixture replacement. New bathroom materials from brands like Kohler and Cambria hold up well to hard water, but no finish is immune to skipped maintenance. If you know your Fort Worth home is on the harder end of the city’s water supply, plan for a water softener or filtration system during the remodel. It’s a fraction of the cost of replacing fixtures down the road.
Grout Cracking Patterns and What They Tell You
Grout cracks are diagnostic. The pattern tells you whether the problem is cosmetic or structural, and the difference between a 30-minute touch-up and a substrate rebuild is visible if you know how to read it.
- Hairline cracks along the joints between floor and wall. This is normal movement and a good sign it’s cosmetic. Fill with a flexible sealant, not rigid grout.
- Cracks that follow the corners of the shower or a pattern radiating from the drain. This points to substrate movement or a pan that wasn’t properly supported. The grout is the messenger, not the problem.
- Cracks that reappear within weeks of being filled. Water is moving underneath. Cracking grout plus a musty smell is one of the clearest signals of a failed membrane behind the tile.
- Cracking along horizontal lines at the shower niche or bench. The niche or bench is deflecting water into the wall, and the grout is cracking from repeated saturation and drying cycles.
- Widespread cracking with soft or hollow-sounding tile. The membrane has failed. Grout and thinset are debonding from the substrate. Tapping the tile with a plastic tool will sound different where adhesion is lost.
If the cracks are hairline and cosmetic, a reseal will hold them. If they’re recurring, radiating from a fixture, or paired with soft tile, plan on opening the wall or floor to inspect the substrate. In our experience across Fort Worth remodels, recurring grout cracks in a shower almost always mean water is behind the tile.
Ventilation and Moisture: The Slow Failure Nobody Watches
A bathroom without proper exhaust fan sizing and venting is a slow failure. The moisture from showers accumulates in the wall cavity and the ceiling assembly, and it doesn’t show up in the first year. It shows up as peeling paint above the shower, darkening grout, a musty smell, and eventually mold behind the drywall.
A standard bathroom needs an exhaust fan that runs 20 to 30 minutes after a shower and pulls enough CFM to clear the room. A small hall bath might need 50 to 80 CFM. A larger master bath with a separate shower and tub needs 110 CFM or more, and a ceiling-mounted fan vented through the roof or wall, not into the attic. Venting into an unvented attic creates moisture problems in the attic assembly instead of the bathroom. That’s a common shortcut we find in Fort Worth remodels of older homes.
Check your fan: hold a piece of toilet paper against the grille with the fan running. If it doesn’t stick, the fan is undersized or the duct is blocked. It should vent outdoors. If it terminates in the attic, that needs correction before you notice anything in the bathroom itself.
Common Mistakes to Avoid
- Waterproofing the floor but not the wall substrate. The pan-to-wall transition is where most failures live. A membrane that stops at the floor leaves drywall, cement board, and framing exposed to every shower.
- Skipping the flood test on a new shower pan. A 24-hour water test before tile is the single cheapest way to catch a leak. On a Fort Worth remodel, skipping it means the leak shows up after the tile is grouted.
- Setting the drain slightly high to “compensate” for tile thickness. A drain even a quarter-inch high leaves a puddle that never dries and accelerates grout failure.
- Adding tile over existing flooring without adjusting the toilet flange. The wax ring can’t reach the bowl horn, and water damage follows within months.
- Venting the exhaust fan into the attic. It moves the moisture problem from the bathroom to the roof framing and shows up as rot above the ceiling.
- Ignoring Fort Worth hard water. New fixtures and grout look pristine at install and then degrade quickly when descaling and resealing aren’t on a schedule.
- Putting a walk-in shower on undersized supply lines. No valve calibration fixes a shower that’s starved for flow. The correction is a plumbing fix, not a fixture swap.
See the difference
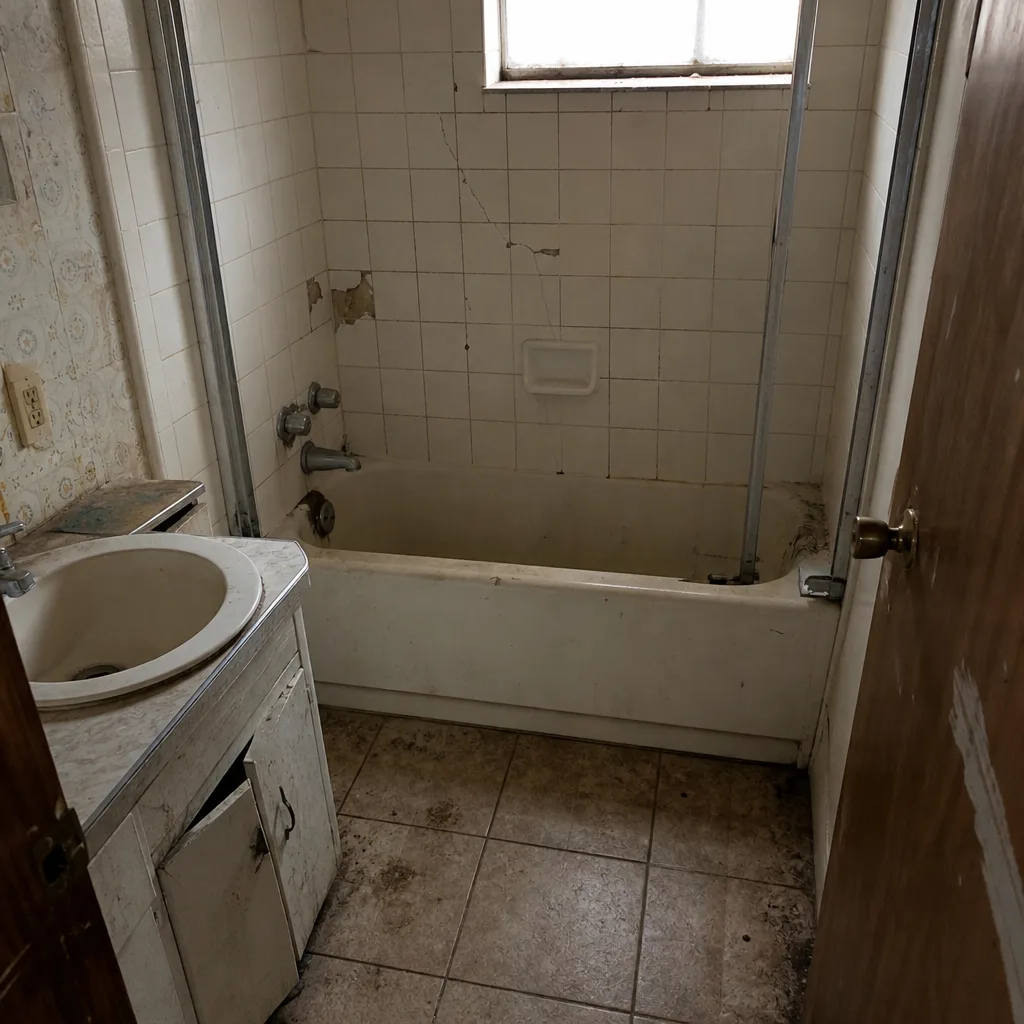 Before
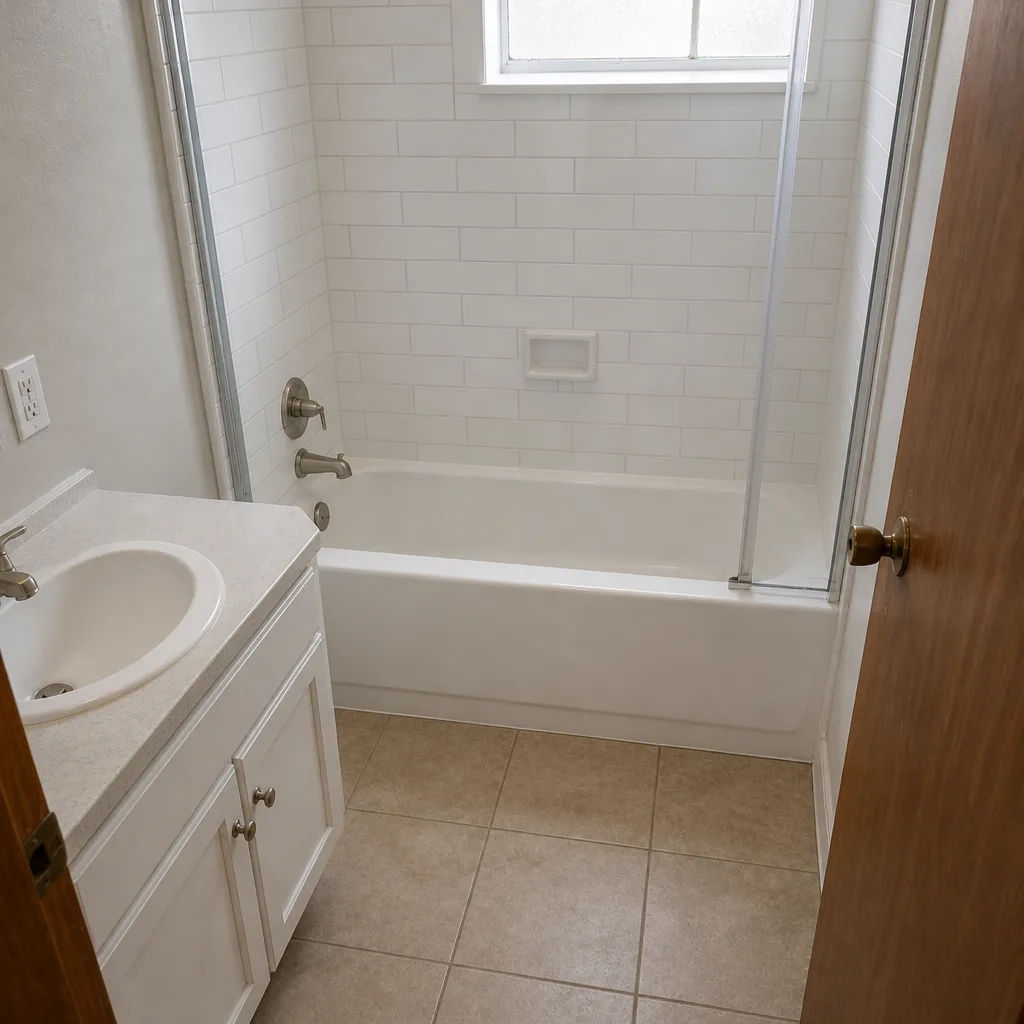 After
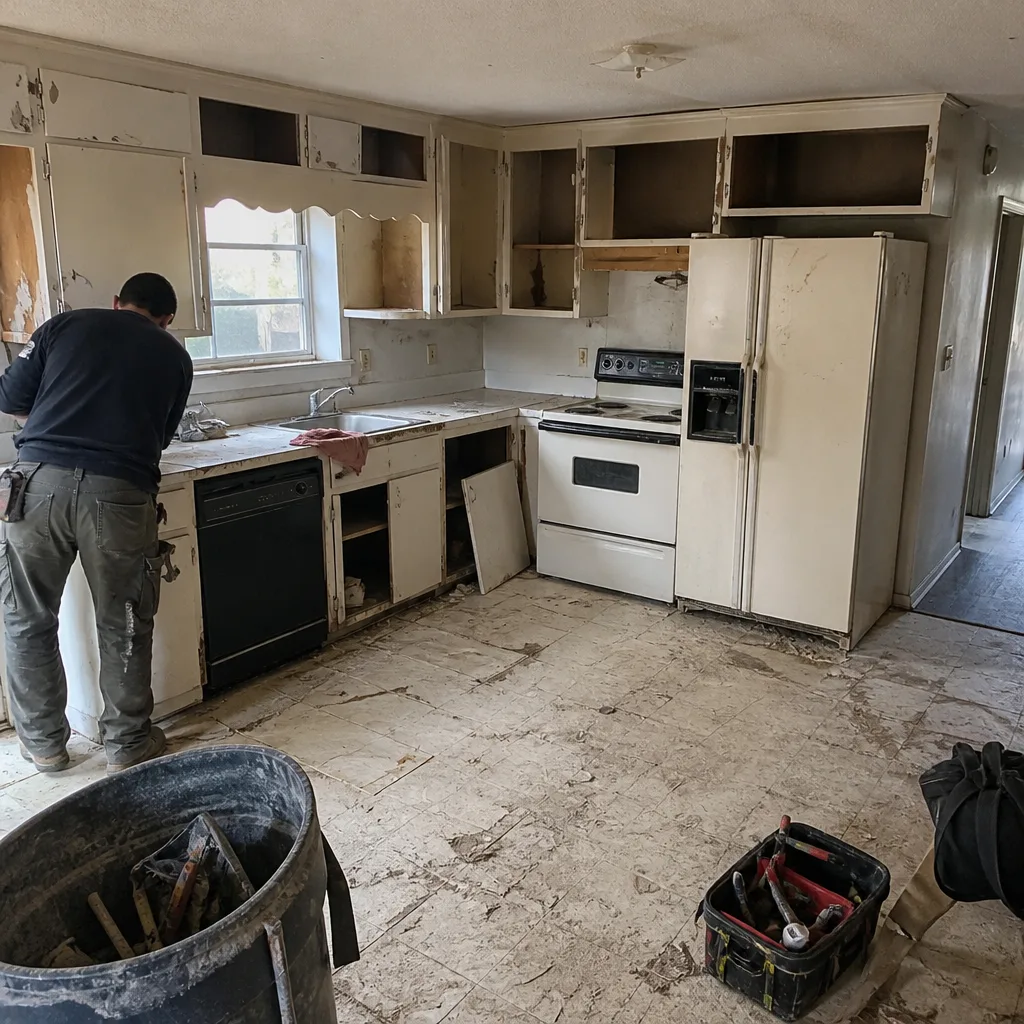 Before
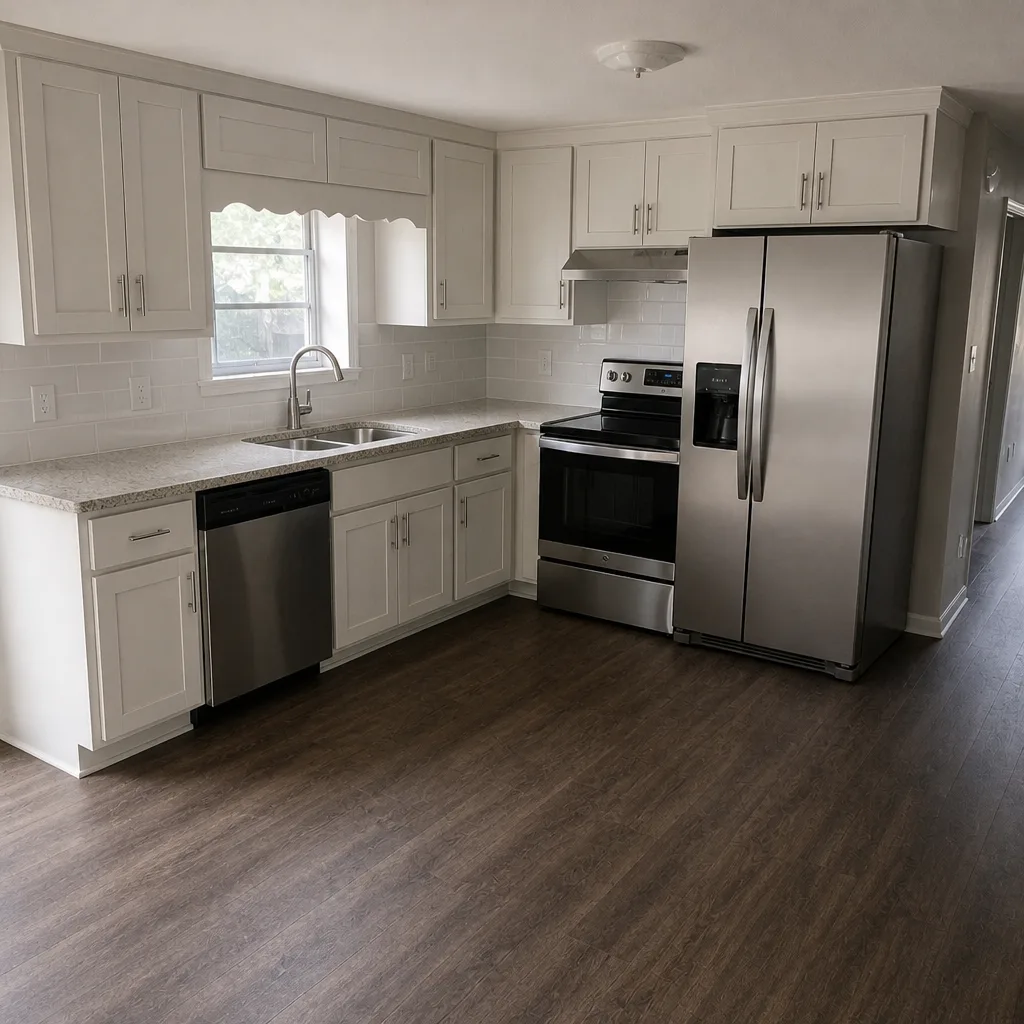 After
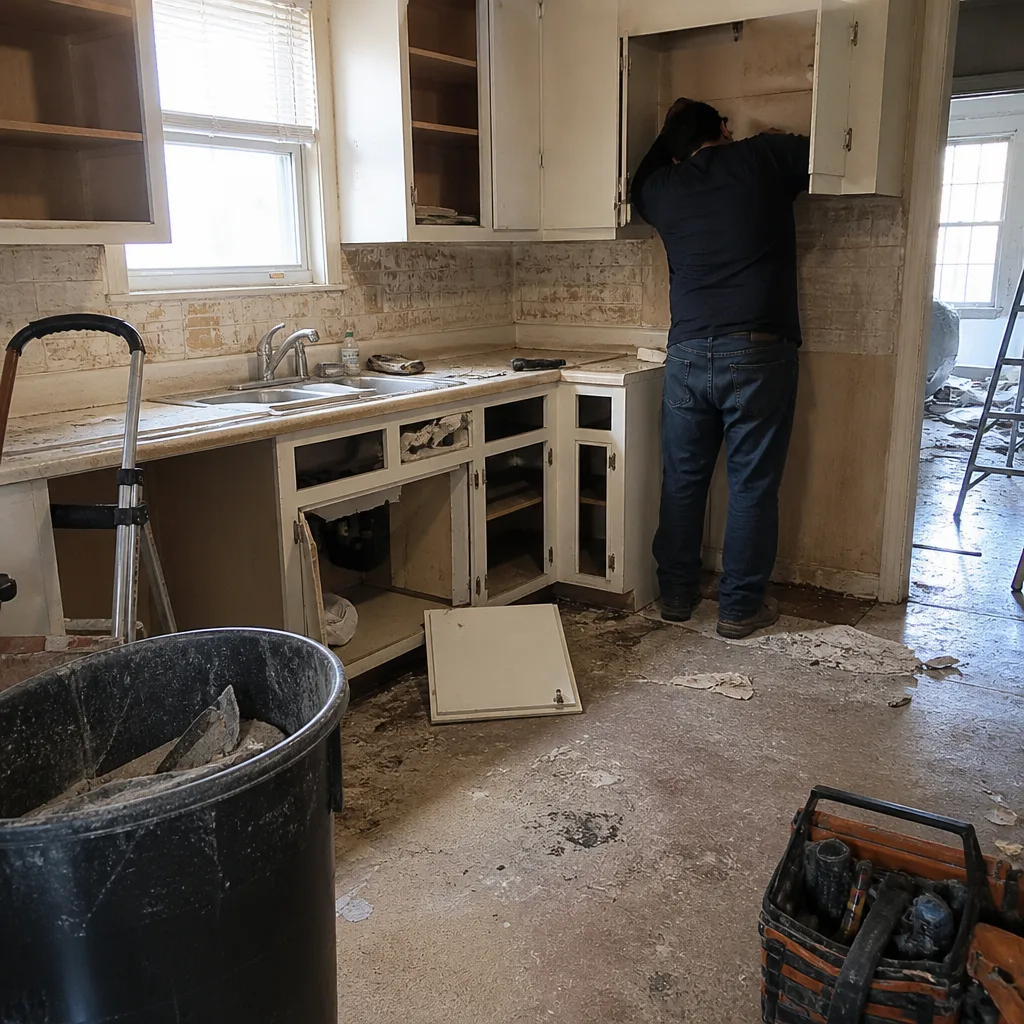 Before
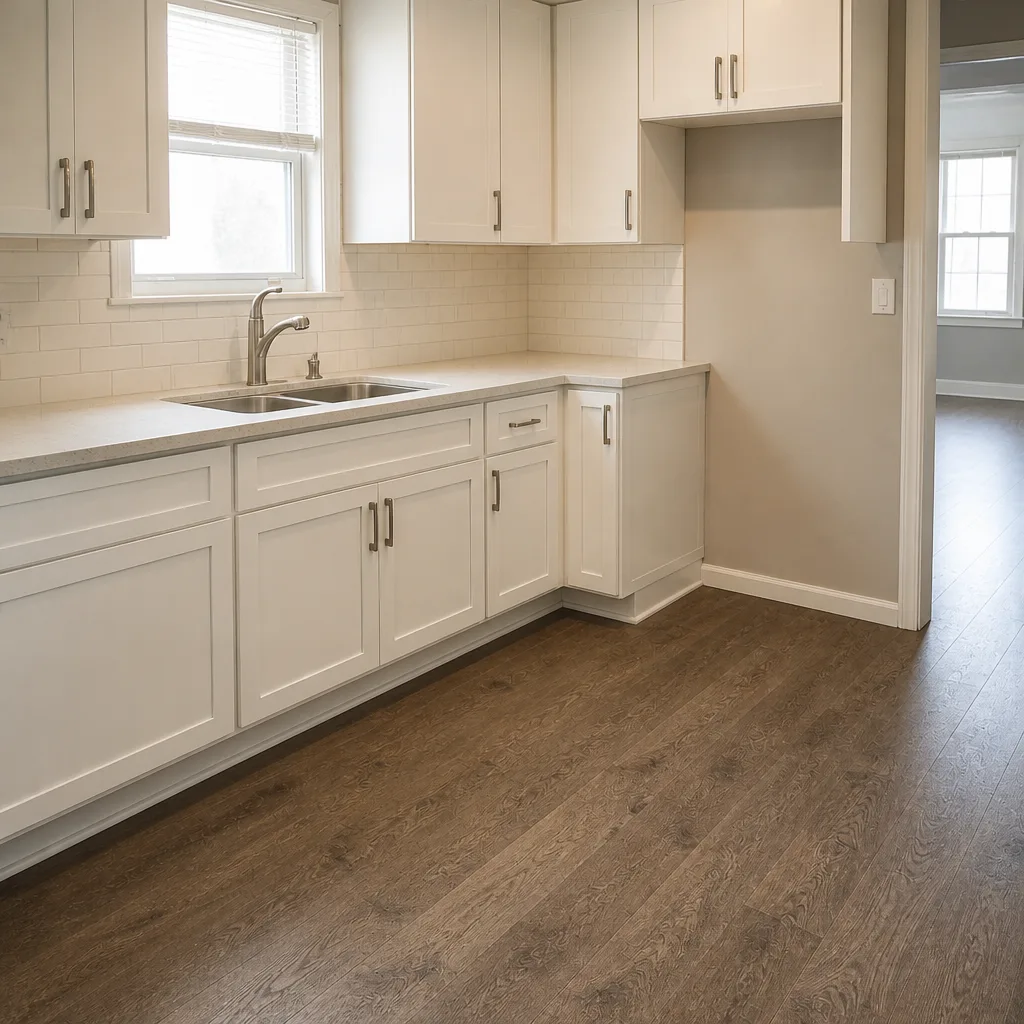 After
When to Call a Professional
Call a professional when the symptom points past the surface: recurring grout cracks in the shower, a puddle on the shower floor after standing water should have drained, water or a musty smell near the base of the toilet, a rocking toilet with dampness at the floor line, or any shower valve that swings temperature with normal fixture use. These six symptoms almost always require opening a wall, floor, or pan. That’s work for a licensed, insured contractor with a written scope and a warranty, not a handyman. Groundwork Construction Co. of Fort Worth offers free estimates in Fort Worth – call (855) 912-5373. Every project is covered by our 730-Day Done Right Promise, and our technicians have up to 12 years of experience, so you know the repair is done right the first time and backed in writing.
Frequently Asked Questions
A failed shower pan repair in Fort Worth typically ranges from $1,800 for a membrane and mortar bed rebuild to $4,000 or more when the framing behind the wall needs replacement. The cost climbs when the pan-to-wall transition failed and the damage reached the studs. Call (855) 912-5373 for a free estimate – we’ll tell you exactly what’s under the tile before quoting.
The clearest signs are a persistent musty smell in the bathroom, grout cracks that come back after resealing, soft or hollow-sounding tile, and water staining on the ceiling below the shower. A shower floor that holds a puddle more than an hour after use is also a warning sign of a failed pan. Call (855) 912-5373 for a free estimate and a professional inspection.
The correct slope is a minimum of one-quarter inch of fall per linear foot of shower floor toward the drain. That means a four-foot shower needs at least an inch of drop from the far edge to the drain. Anything flatter pools water and won’t pass a proper inspection.
Only if the flange is at or above the finished floor and the subfloor is solid. If the toilet rocks because the flange sits below the tile, or if there’s water damage around the drain, replacing the wax ring alone won’t fix it. The flange has to be raised or the subfloor repaired. Call (855) 912-5373 for a free estimate on Fort Worth toilet repairs where the flange is the problem.
Either the pressure-balancing valve cartridge is stuck or misadjusted, or the shower valve is on undersized supply lines. Test it by running the shower alone; if temperature is steady with no other fixtures on, the valve needs recalibration or replacement. If pressure is always low, the supply lines are undersized and no valve adjustment fixes it.
Seal new grout 72 hours after installation, then reseal annually in a shower and every 18 to 24 months on bathroom floors. Fort Worth’s hard water wears through sealer faster than soft water municipalities, so the one-year shower schedule is the realistic minimum. If water absorbs into the grout instead of beading, it’s time to reseal.
The Bottom Line
Bathroom remodels fail in predictable places: at the pan-to-wall transition, in the niche back wall, at the curb corners, in the drain slope, and behind the toilet flange. Every one of them stays hidden for 12 to 24 months before it becomes structural damage. The fix on the front end is inspection before tile goes up. The fix on the back end is opening the assembly and rebuilding it properly, which is not a tile job. If you’re in Fort Worth and any of the symptoms in this guide sound familiar, the estimate is free – call (855) 912-5373 and we’ll tell you what’s behind the tile before it gets expensive.
Written by the team at Groundwork Construction Co. of Fort Worth.