Last updated November 18, 2026

Free written scope consultation - allowances, timeline, and change-order rules on paper before a single trade is scheduled
Driveway & Pavers Troubleshooting: Common Problems and How to Fix Them
A sunken paver and a shifted paver look almost identical at a glance. One is usually a base problem. The other is almost always an edge problem. Fix the wrong one and you’ll be pulling that same section apart again in 18 months, except the second time the base underneath will be worse. We’ve torn out driveways in Fort Worth where a homeowner patched the same four pavers three times because nobody diagnosed what was actually moving. This guide teaches you to read your driveway’s failure pattern the way a mason does: match the symptom to the root cause, then decide whether it’s a Saturday project or a full base rebuild.
Quick Answer
Most driveway and paver problems come down to four root causes: a base that wasn’t compacted in lifts (sinking), water that can’t escape (joint sand washout and cracked pavers), tree roots lifting the field (heaving), or Fort Worth’s expansive clay swelling and shrinking under the slab (undulating bumps). The fix depends entirely on which one you’re looking at. Resetting a few pavers is enough when the base is sound. When the base is failing, anything short of a rebuild is cosmetic and will fail again.
Styles & brands we work with
- Kitchen remodeling
- Bathroom remodeling
- Home additions & ADU
- Roofing
- Windows & doors
- Driveway & pavers
- Fence
Table of Contents
- How to read your paver failure pattern before you call anyone
- Why are my pavers sinking? Three different causes, three different fixes
- What cracked pavers tell you about drainage and grade
- Why Fort Worth clay causes heaving that looks like settling
- Joint sand washout: a drainage design problem, not maintenance
- Tree roots, root intrusion, and what you can actually do about it
- Cosmetic fix vs. structural repair: how to tell them apart
- Does sealing actually solve anything?
How to read your paver failure pattern before you call anyone
Before you call a single contractor, walk your driveway with a 4-foot level, a hose, and a notepad. Note where water pools after you run the hose for two minutes. That takes about ten minutes and gives you more diagnostic information than any phone call. A driveway that pools in the middle of the field is a grading problem. A driveway that pools at the apron where it meets the street is a drainage outlet problem. Those are different conversations.
Now note the pattern of movement. There are a few common ones, and each points to a different cause:
- Individual pavers dipping, one or two at a time. Usually a small base void or a broken compacted layer under those specific units.
- A whole field section sagging toward one side or the middle. Base compaction or a drainage failure underneath the whole area.
- A section rising, with joints opening at the perimeter but tight in the middle. That’s heaving, not settling. The root cause is pressure from below.
- Paver edges tipping up like a see-saw, with sand washing out along the joint lines. Edge restraint failure or a drainage outlet problem.
- A ripple pattern of bumps and dips running across the width of the driveway. Almost always expansive clay underneath, which is endemic in Fort Worth.
The reason this matters: if you see a section rising (heaving), adding sand to the joints and re-leveling the pavers does nothing. You’re compacting against a force that will just push the pavers up again. If you see a section sinking with open joints, sealing it just hides the problem. Get the pattern right and the fix is obvious. Get it wrong and you’ll spend the repair budget twice. When in doubt, we run a level-line survey and a moisture check before we quote anything – the free estimate from Groundwork Construction Co. of Fort Worth includes exactly that diagnostic work, and you’ll know what’s actually wrong before you commit to any repair.
Why are my pavers sinking? Three different causes, three different fixes
Sinking is the most common call we get. It’s also the most misdiagnosed, because “my pavers are sinking” describes a symptom, not a cause. In our experience across Fort Worth driveways, sinking traces to one of three root causes, and they each require a completely different repair path.
Cause 1: Base compaction failure
This is the big one. Pavers sit on a layer of compacted crushed stone (usually 4 to 6 inches for a residential driveway, 6 to 8 for heavier vehicle loads), which sits on compacted subgrade. If the crushed stone layer was placed in one thick pass and compacted once, the bottom of that layer never actually consolidated. It settles over the next 12 to 36 months, and the pavers follow. The tell is a broad, even dip across a whole field area, often 1/2 to 1 inch deep and growing slowly. The repair path: remove the pavers, remove the failed base, relay the base in 2-inch lifts with a plate compactor at each lift, relay pavers. This is the structural repair.
Cause 2: Erosion under the base
Water gets under the pavement and washes out the fines that hold the crushed stone together. You end up with a void under the surface, and the pavers sag into it. The tell is a localized dip, often near a downspout, a low spot, or a joint that’s been letting water through. The repair path: fix the water source first (this is the hard part), then rebuild the affected base section. If you skip the water source, the void comes back.
Cause 3: Root intrusion
A tree root lifts or displaces pavers from below. This one looks like localized heaving – a small bump or a tipped paver, often in a straight line following a root. The tell is a paver that’s actually lifted, not sunk. The repair path: this depends entirely on the tree. Removing the root can kill a mature tree. Root barriers, rerouted base, or in some cases removing the tree are the real options. Call an arborist if the tree matters to you.
The clean diagnostic question is this: is the paver sunk into a void, or pushed up by something below? Sunk = base or erosion. Pushed up = roots or clay heave. Everything else is a variation. When we quote a Driveway & Pavers in Fort Worth repair, that’s the first thing we check before we talk price.
What cracked pavers tell you about drainage and grade
A crack in a paver is not a paver problem. Concrete pavers are rated for roughly 8,000 psi compressive strength; the material itself doesn’t crack under normal residential loads. When a paver cracks, something is pushing on it unevenly. Either a point load sits on a small high spot, or water has undermined part of the base so the paver is bridging a void and taking stress across the width. Almost every cracked paver we see in Fort Worth traces back to standing water that was never addressed.
Here’s the diagnostic sequence:
- Run a hose on the driveway for 10 minutes. Watch where water pools and where it runs off. If water reaches the street within 30 seconds of the lowest point, drainage is probably okay. If it sits, note where.
- Check the slope with a 4-foot level. A residential driveway should fall about 1/4 inch per foot away from the house, and toward the street or a drainage outlet. Under 1/8 inch per foot is a problem.
- Look at the apron where the driveway meets the gutter. If the apron sits flat or drops below street grade, water back-flows into the base.
- Find the low spot. Cracks cluster near it. That’s your drainage problem point.
- Inspect the downspouts and any area drains. A downspout discharging 6 inches from the driveway edge is feeding the problem.
Once water finds a low spot, it seeps through joints, into the base, and out through the side. Along the way it washes out the fines that bind the crushed stone, creating voids. Repeat for a couple winters and you have cracked pavers over those voids. The repair isn’t replacing pavers – that’s how you end up replacing them again next year. The repair is regrading the base so water runs off, then relaying. Same pavers, correctly supported, don’t crack under a Ford F-150.
For related exterior drainage and site issues, our Fence Installation in Fort Worth work often runs into the same grade problems, and the same drainage-first thinking applies.
Why Fort Worth clay causes heaving that looks like settling
This is the Fort Worth-specific problem that trips up just about every homeowner, and a fair number of tradespeople. Fort Worth sits on expansive clay soils, particularly in older neighborhoods and across the west and north sides. Expansive clay swells when it takes on water and shrinks when it dries out. Over a season, that movement can be an inch or more in either direction. Under a driveway, the clay doesn’t move evenly. It moves in patches, based on how water reaches the ground – so a driveway can lift in one section and sag in another within the same spring.
The tell is a “wave” pattern – bumps and dips alternating across the width of the driveway, with joints opening slightly at the high points and closing at the low points. Homeowners read the dips as sinking and call about base failure. They’re not wrong that the pavers are moving. But the force causing it is coming from below, not settling from above. Adding base or re-sanding under the dips just shifts the problem. The paver moves again at the next wet-dry cycle.
What actually fixes expansive clay heaving:
- Soil stabilization. Installed during a rebuild, this treats the clay so it doesn’t swell and shrink as aggressively.
- Moisture management. Grading the site so surface water drains away from the driveway rather than into the subgrade, and making sure gutters discharge a full slope away.
- Thicker base with a geotextile separation layer. This spreads the load and discourages differential movement.
- Accommodating the movement. In areas where full stabilization isn’t practical, the driveway can be designed with more flexibility in the joint system so small movement doesn’t crack or displace pavers.
In our experience in Fort Worth, homeowners who describe their driveway as “moving in two directions at once” are almost always looking at expansive clay, not base failure. The right diagnosis saves thousands. The wrong one costs a full rebuild twice. This is exactly the kind of thing we walk through in the free estimate before we ever propose a scope – the number you see is the number you pay, and the scope is based on the actual failure, not a guess.
Joint sand washout: a drainage design problem, not maintenance
Joint sand washes out of residential driveways all the time. The internet’s advice is almost always “top it up every spring.” That misses the point. Sand stays in the joints when water runs off the surface. Sand leaves the joints when water runs through the surface and out at the perimeter. If you’re topping up the sand more than once a year, your driveway has a drainage design problem.
Here’s what’s actually happening. When poly sand or polymeric joint sand is properly installed, it fills the joints to within about 1/8 inch of the pavers and hardens into a flexible mortar that resists washout. If the install didn’t fill the joints deeply enough, or the wrong sand was used, or the joint pattern was set up in a way that invites water intrusion, the sand migrates out. Underneath, the base gets hit with the water, and eventually the base fails. So joint sand washout is the early warning system for the base problems in the previous sections.
What actually solves it:
- Regrade so surface water runs off, not through. Correcting the low spots and slope issues stops the water intrusion at its source.
- Use the correct joint sand for the application. Polymeric sand, properly installed, holds up against Texas sun and rain cycles far better than plain masonry sand.
- Install joint sand at the correct depth. Filling the joint to the top and sweeping off the excess is the difference between 8 years and one.
- Check edge restraint. Pavers at the perimeter move a tiny amount when edges aren’t contained. That movement opens joints, which lets more water in.
- Re-apply only after the drainage is fixed. Otherwise you’re refilling a leak.
In Fort Worth where summer thunderstorms deliver a lot of water in short windows, this matters more than in most markets. The right call is to fix the drainage, then re-sand once and be done with it. The wrong call is to buy a bag of sand every March for the rest of your life. If you want a free walkthrough of where your water is going, call us – the diagnosis piece is included in the estimate.
Tree roots, root intrusion, and what you can actually do about it
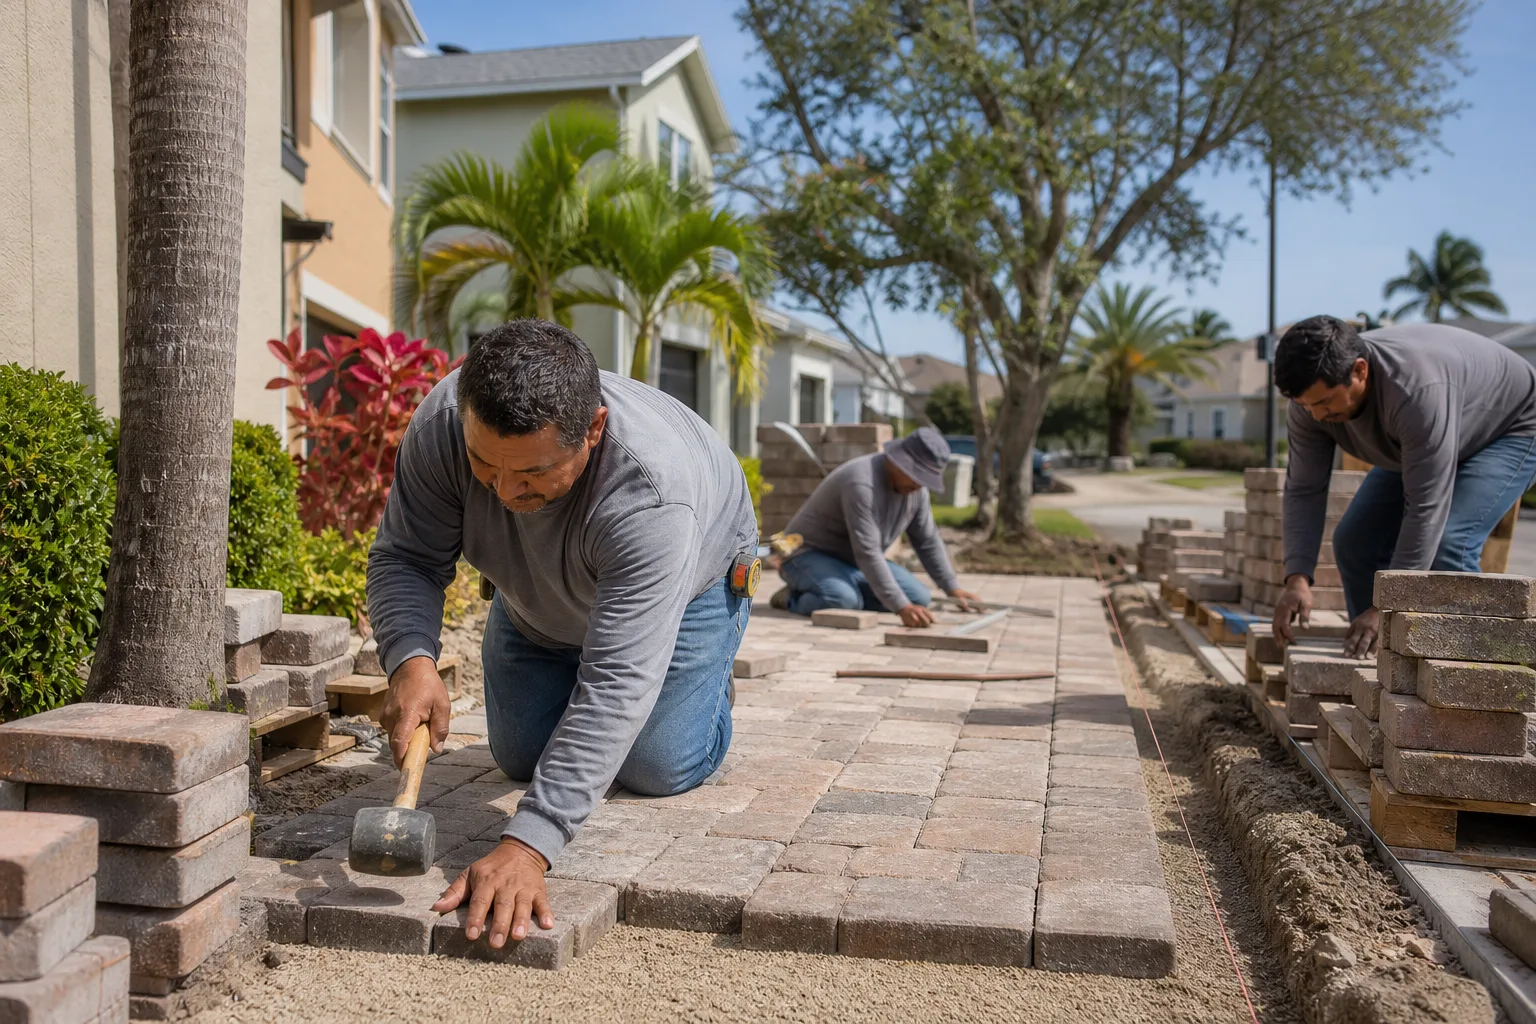
Tree roots are the third common cause of paver lifting, and the most personal to solve because the answer isn’t always “pull pavers.” A mature live oak or pecan within 10 to 15 feet of a driveway will send roots under it. The roots don’t break pavers directly. They lift the base as they grow, and the pavers follow. What you see is a growing bump, often in a straight line following the root.
Your real options, in order from least invasive to most:
- Re-lay pavers with a flexible base layer around the root. This accommodates minor lifting and buys time. It’s a partial fix, not a permanent one.
- Install a root barrier. A rigid barrier along the driveway edge redirects the root growth. It has to be installed at the right depth to work, and mature roots can sometimes get around it.
- Remove the offending root. This is the highest-risk option because cutting a mature root can compromise the tree, and in some cases kill it. An arborist consult is non-negotiable here.
- Remove the tree. The last and most costly option, and one that many homeowners with mature trees won’t consider.
The mistake we see most often is a homeowner who has the pavers lifted and re-set without addressing the root. It buys 12 to 24 months, then the problem returns. If the tree matters to you, get the arborist in before you re-lay pavers. The cost of a tree consult is tiny compared to re-doing the driveway every two years.
Cosmetic fix vs. structural repair: how to tell them apart
The $64,000 question on every paver driveway repair is: can we reset a few pavers, or does the whole base need to come up? Here’s how we decide, and how you can decide with a contractor you trust.
Cosmetic fixes work when:
- The problem is localized (1 to 5 pavers), and the surrounding field is stable.
- The base under the affected area is solid when you tap it or feel it through the joint.
- The root cause is a single event (dropped a heavy load, one paver was already damaged at install) rather than an ongoing force.
- Lifting the affected pavers and re-bedding on fresh base with fresh joint sand fully stabilizes them.
Structural repairs are required when:
- The dip is broad – more than 3 to 4 pavers in every direction, or a section wider than 4 feet.
- The dip has recurred after a prior cosmetic fix.
- Joint sand washes out repeatedly in the same area.
- Pavers are cracked across a field, not just at the perimeter.
- You can feel soft or hollow spots under pavers when you walk on them.
- Edge paver aprons are lifting or tipping, showing restraint failure.
The honest rule: if you fix the same spot twice, the third time is a structural repair. We tell homeowners this in the first conversation, because it saves them money and it saves us a callback. The 730-Day Done Right Promise backs that up – if a cosmetic repair we recommend doesn’t hold, we come back and make it right. That’s why we recommend structural only when it’s actually the answer.
Does sealing actually solve anything?
Sealing is one of the most over-promised repairs in the paver world. Sealing a driveway that has a drainage problem hides the problem for about a year, then the sealant starts to fail over the same low spots and cracks that were already forming. Sealing after the drainage is fixed is a legitimate way to protect a healthy driveway. Sealing as a repair for a sick one does almost nothing.
When sealing is worth it in Fort Worth:
- Newer driveway with stable base and correct grading, for sun and stain protection.
- Driveway with original install quality intact, as yearly or bi-yearly protection.
- Joint sand has been fully installed and is stable for at least a year.
- Any prior drainage failures have been fixed and confirmed by a wet-season season.
When sealing is a waste of money:
- Any driveway with a current drainage problem, active joint sand washout, or visible sinking.
- Driveway with expansive clay heaving and no stabilization in place.
- Cracked pavers over an undermined base – the crack will just return.
- Any driveway where a cosmetic repair was just completed and the base hasn’t had a full season to prove itself.
A sealed driveway looks better in year one and year two. A correctly-drained driveway looks better in year ten. The order of operations matters: fix the base, fix the water, then seal. If a contractor’s first recommendation on a failing driveway is sealing, that’s a signal.
Common Mistakes to Avoid
- Topping up joint sand every year and calling it maintenance. If the sand keeps washing out, the driveway has a drainage problem. Annual re-sanding is the symptom, not the fix. In Fort Worth’s repeated spring thunderstorms, a driveway that needs new sand every March is telling you where the water is going.
- Replacing cracked pavers without finding the void underneath. A new paver over a failing base cracks again in 6 to 18 months, and you’ve spent the money twice. The paver was never the problem.
- Assuming all sinking is the same. Base compaction failure, erosion, roots, and expansive clay all look different once you check. Treating one like another wastes the repair budget. We see this on Fort Worth driveways where expansive clay is the actual mover and a compaction fix does nothing.
- Sealing a driveway that’s still draining badly. Sealant over a failing surface binds it together until the next wet season, then fails along the same joint lines. You’ve paid to delay, not fix.
- Cutting a mature tree root without an arborist. A root removal can kill a live oak worth more than the driveway repair. Order the arborist consult first.
- Adding base under sunken pavers without fixing the water source. You’re adding material into a washout that will keep washing. Whatever you put in comes out next rain.
- Accepting a cosmetic-fix quote for a structural problem. If the dip is broader than 4 feet or has recurred after a prior fix, ask for a structural scope in writing. A contractor who can’t explain the difference is selling you a repeat visit.
See the difference
 Before
 After
 Before
 After
 Before
 After
When to Call a Professional
Some issues are genuinely DIY-friendly: replacing a single broken paver, adjusting a paver that’s tipped up at the perimeter, spot-touching joint sand on a driveway that’s otherwise healthy. Most paver problems are not in that category, because the base layer is where the actual work lives, and getting the base right requires the right compaction, the right lift depths, and the right drainage design.
Call a professional when:
- Sinking, heaving, or cracking affects more than a small cluster of pavers.
- The same area has failed more than once after repair.
- Water pools on the driveway or at an edge after a rain.
- Joint sand keeps washing out despite regular top-ups.
- A mature tree root is the suspected cause.
- You’re not sure which of the four root causes you’re looking at.
Groundwork Construction Co. of Fort Worth offers free estimates in Fort Worth – call (855) 912-5373. We’ll run the diagnostic, tell you whether you’re looking at a cosmetic fix or a structural repair, and write the quote line-item by line-item so you know exactly what you’re paying for. Our technicians have up to 12 years of experience with Fort Worth pavers and driveways, and every job is covered by the 730-Day Done Right Promise.
Frequently Asked Questions
Small cosmetic repairs (resetting a handful of pavers, refreshing joint sand, re-seating a localized dip) typically run a few hundred dollars in the Fort Worth market. A structural repair that involves removing base, correcting grading, relaying base in compacted lifts, and re-setting the field runs into the low thousands for a typical residential driveway section, and more if expansive clay stabilization is required. The exact number depends on the square footage affected, whether drainage correction is needed, and whether the existing pavers can be reused. Call (855) 912-5373 for an exact quote – estimates are free and the number you see is the number you pay.
Only if the driveway doesn’t actually have a drainage problem. Re-sanding stabilizes a healthy driveway. It does not fix a driveway where water is running through the joints into the base, because the sand will wash out again at the next wet period. If you’re re-sanding more than once a year, the driveway has a drainage issue and the sand is a symptom, not the fix.
Because the wrong thing was repaired. If the sinking was originally caused by base compaction failure and only the pavers were re-set, the base continues to settle and the pavers follow. If it was caused by expansive clay heaving and stabilization wasn’t installed, the clay keeps moving. The repair path has to match the failure cause. A free diagnostic at your home will tell you which one you’re looking at.
Not when we quote the job. We quote upfront with line items for each phase – removal, base correction, drainage, re-installation, joint sand. If we discover something during removal that we couldn’t see before (damaged base beyond the visible failure, unexpected root intrusion), we stop and re-quote before proceeding. No surprise change orders after the fact. If the scope we wrote is the scope we complete, the number on the quote is the number you pay.
Most residential driveway repairs, resets, and re-sanding don’t require a permit. Full driveway replacements, work involving changes to drainage that affect the public right-of-way, and some ADU-adjacent hardscape work do. We confirm the permit requirements for your specific address before we start and pull whatever permits apply. If permitting is required, the permit and inspection process is included in the scope and the price, not billed separately.
Cosmetic repairs typically wrap in a single visit. A structural repair where a section of base is removed, corrected, and re-compacted before the pavers are re-installed usually takes two to four days depending on square footage, weather, and whether expansive clay stabilization is required. Full driveway replacements run five to ten days. We give a day-by-day schedule with the written quote, and most jobs are completed in a single visit when the scope allows.
The Bottom Line
Most paver driveway problems are not random. They trace to one of four root causes: base compaction failure, erosion, root intrusion, or Fort Worth’s expansive clay heaving. Read the failure pattern first – a sinking section, a heaving section, and a section with open joints all point to different fixes. Resetting pavers over a failing base wastes the money. Sealing a driveway with a drainage problem wastes more. When you’ve identified which cause you’re looking at, the right repair becomes obvious: cosmetic when the base is sound, structural when it isn’t.
If you’re not sure which cause you’re looking at – or if the same spot has been fixed more than once – it’s worth getting a real diagnostic. Our team at Groundwork Construction Co. of Fort Worth walks the driveway with you, checks the base, checks the grade, and checks the pattern before we quote. Every job is covered by the 730-Day Done Right Promise, and every quote is line-item with no surprises. For driveway work that connects to a broader home improvement project, our Home Additions & ADU in Fort Worth team handles the site work and drainage in a single coordinated scope. Start at our Groundwork Construction Co. of Fort Worth home page for the full picture of what we do. And when you’re pricing driveway work, remember the reader of a repair guide is one phone call away from a free estimate: the diagnostic call is free, the quote is written, and the estimate is yours to keep. Call (855) 912-5373 for your free estimate on Fort Worth driveway and paver repairs.
Written by the team at Groundwork Construction Co. of Fort Worth.